Personal and Professional Projects
Exterior doors for 27 Catalina
- Replace plywood doors for 1972 Catalina 27' sailboat
- Manufactured from 1/2" HDPE
- Modelled in Solidworks
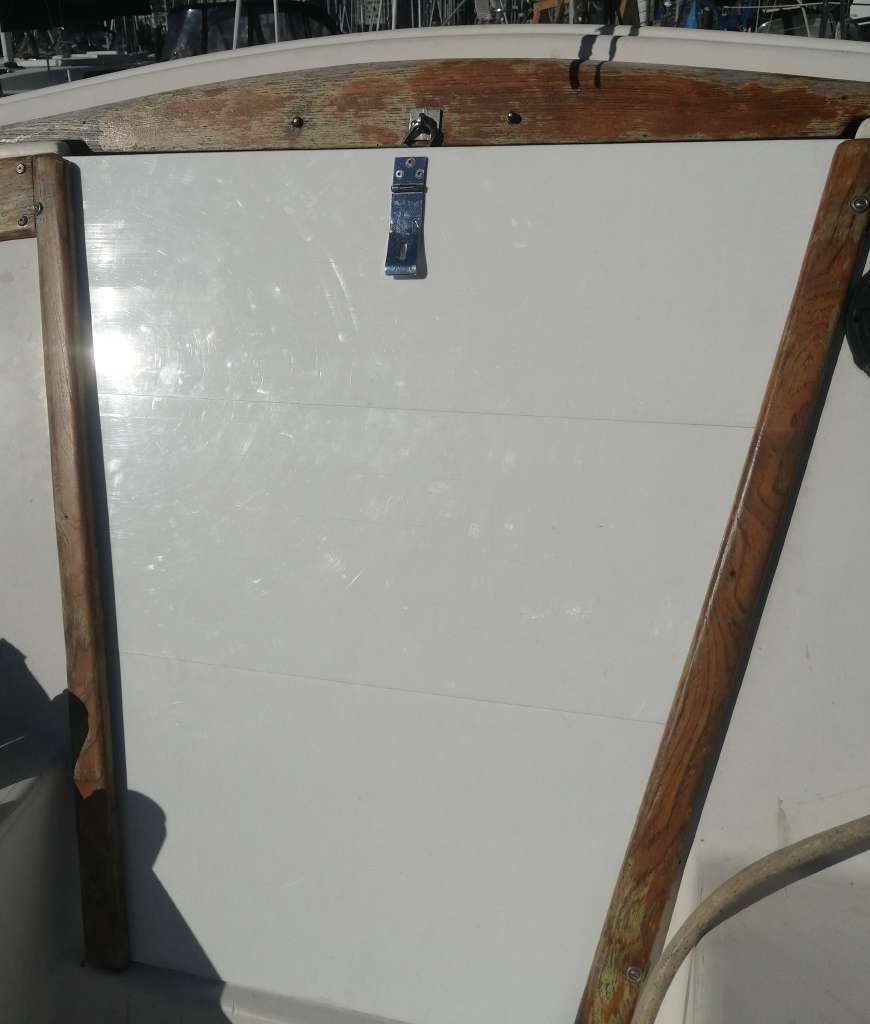
My friends and I are lucky enough to co-own a 1976 Catalina 27’ sailboat. My 2023 summer project was to replace the plywood doors, as they were rotting and getting squishy. I wanted to replace the plywood with a superior material that would last for longer, and researched price, durability, and UV resistance of High Density Polyethylene (HDPE) material. It comes in 1/2” thick sheets, and can be machined with most tools used for plywood.
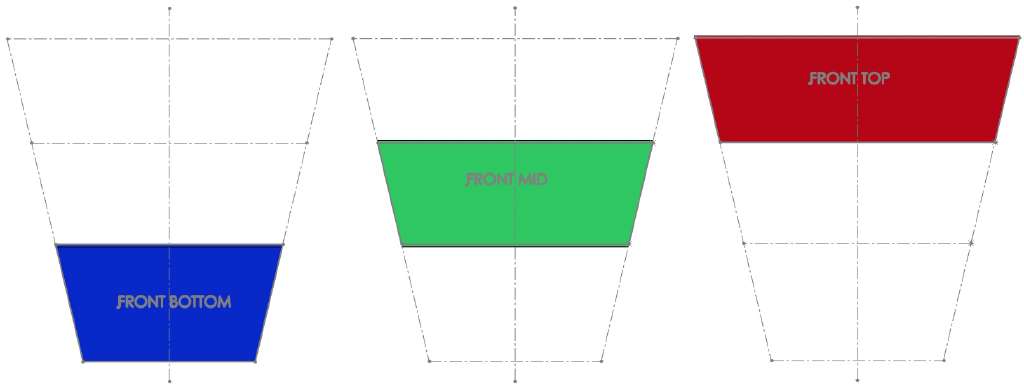
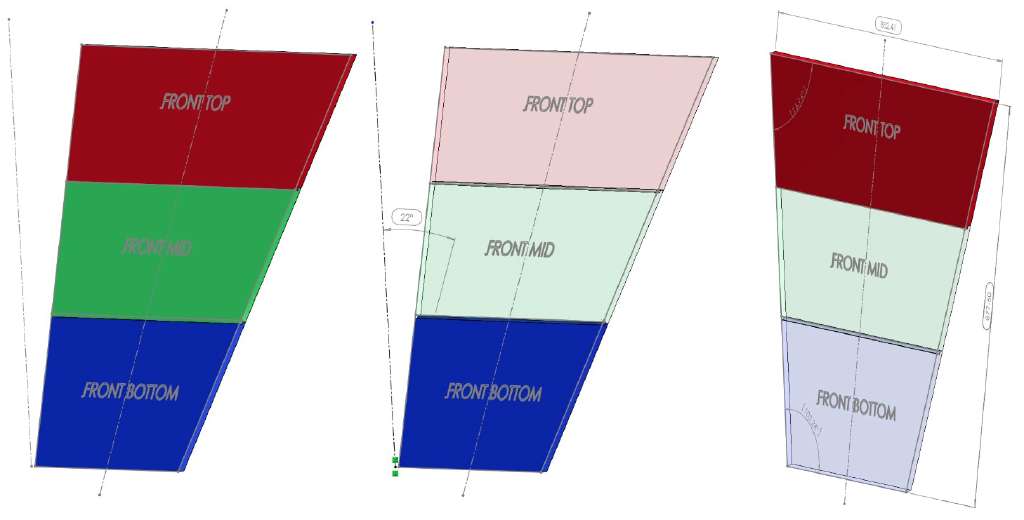
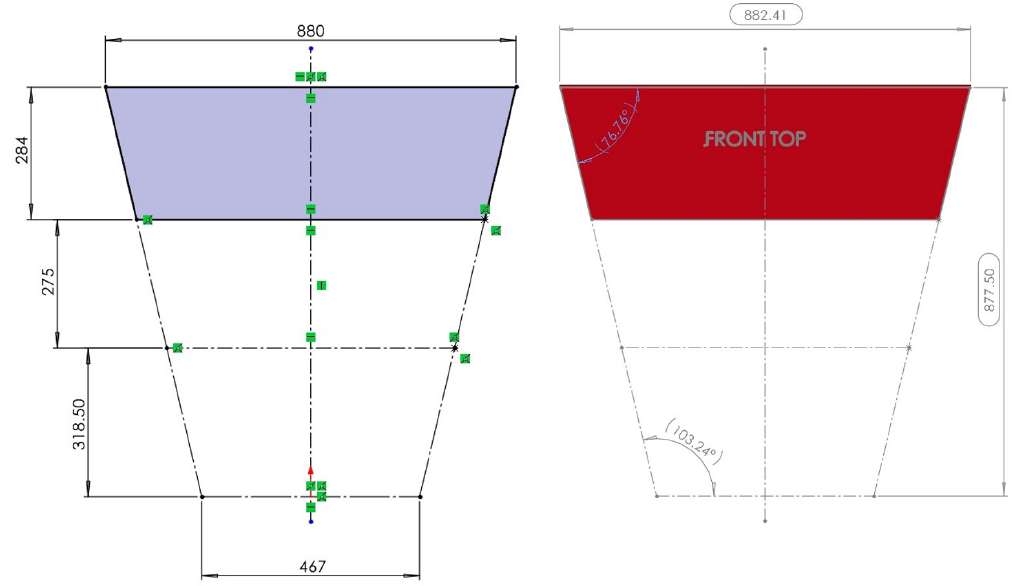
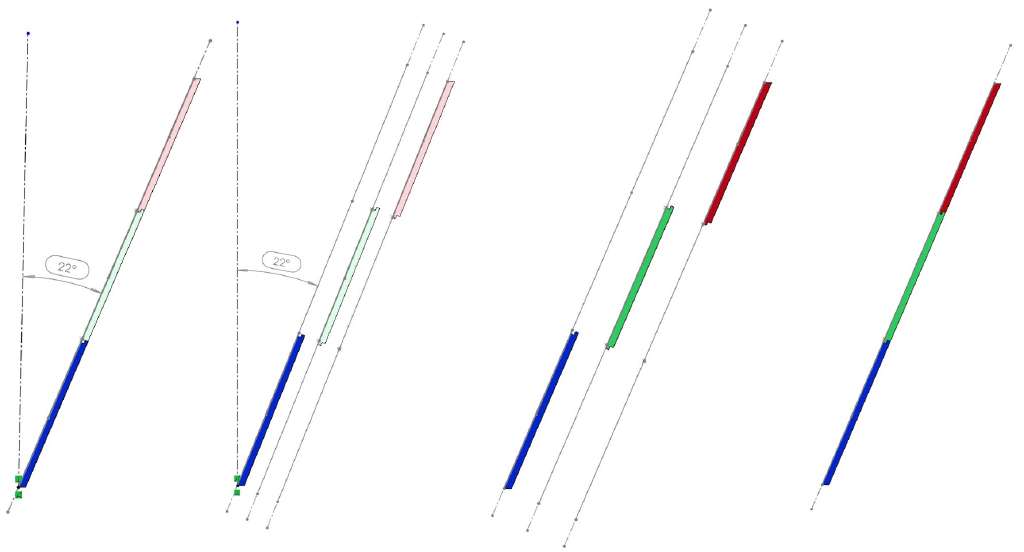
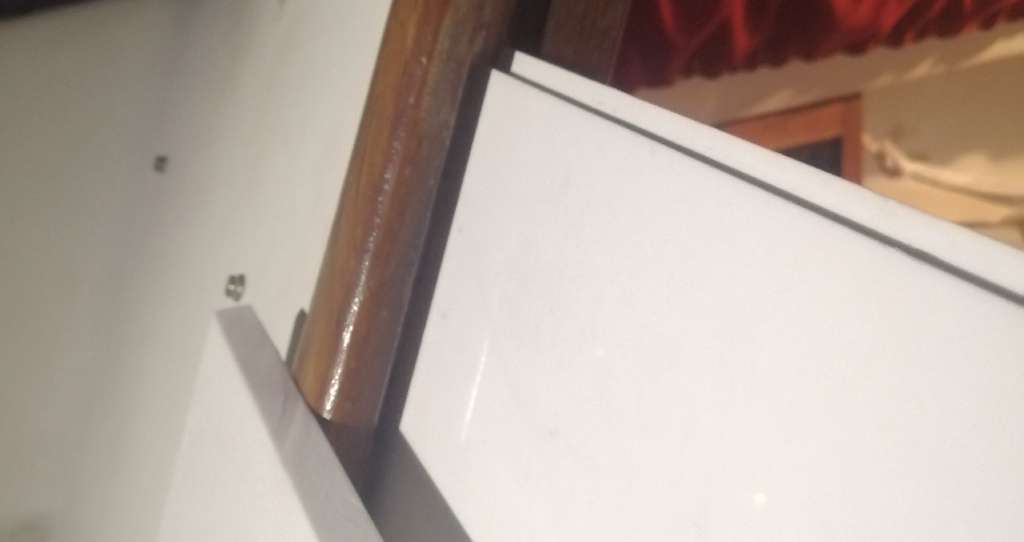
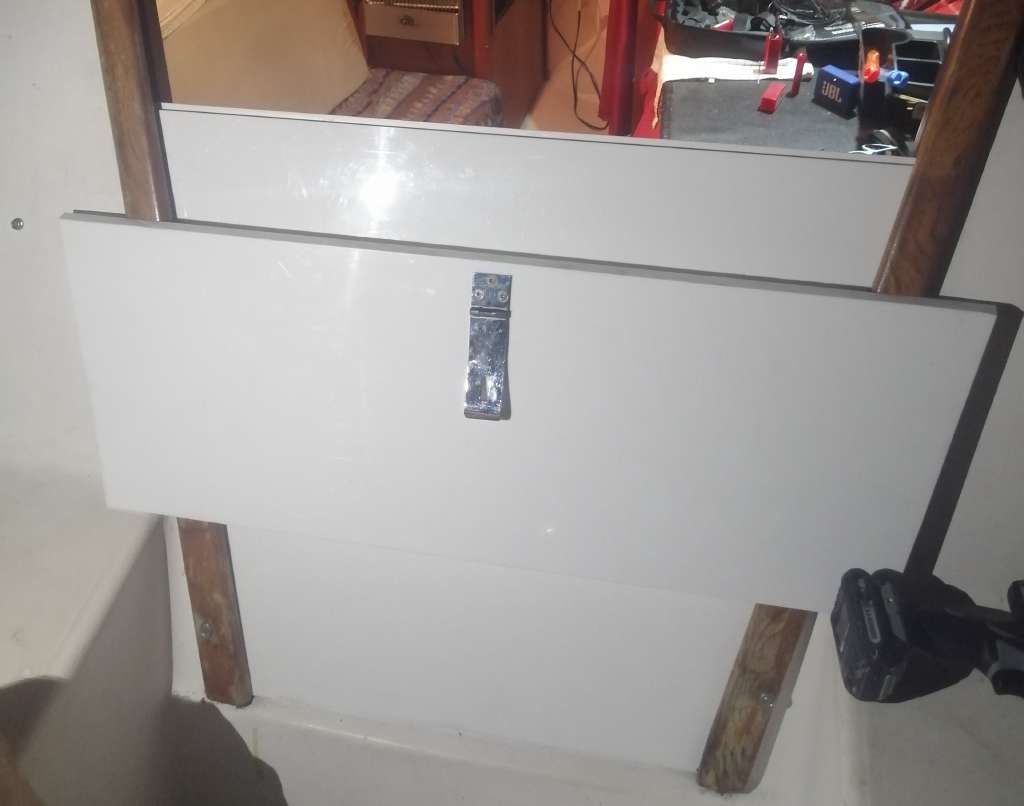
It was tricky to measure the dimensions of the door opening. I used a Solidworks construction sketch, inputting actual measured height, top width, and bottom width to drive the all other dimensions. This calculated the 103° angle, and the width dimensions at the panel seams. I had to manually measure the 22° tilt, difficult as the fiberglass edges are curved in places, and I couldn’t use a bubble level on a floating boat. I built a plywood prototype for the bottom panel to double check the 22° and 103° angles, there was a trial of 20° and 104° before settling on the final dimensions.
I had exactly enough HDPE material, so the panel heights aren't uniform but instead work with the existing stock size I had available. Solidworks was very helpful to determine the width of the shiplap groove, as the dimension on the front and back varies by a few mm thanks to the 22° tilt. With my CAD sketch, I was able to get all dimensions to trace the outline on my HDPE stock.
I used a jigsaw to cut the rough outline, a bandsaw to cut the 103° angle, a table saw to cut the 22° angle, and a manual mill to create the shiplap grooving where the panels interface.
After 5 months I'm happy to report the doors have no visible deterioration, and do a fantastic job keeping out all rainwater. These will last for decades compared to their plywood predecessor.

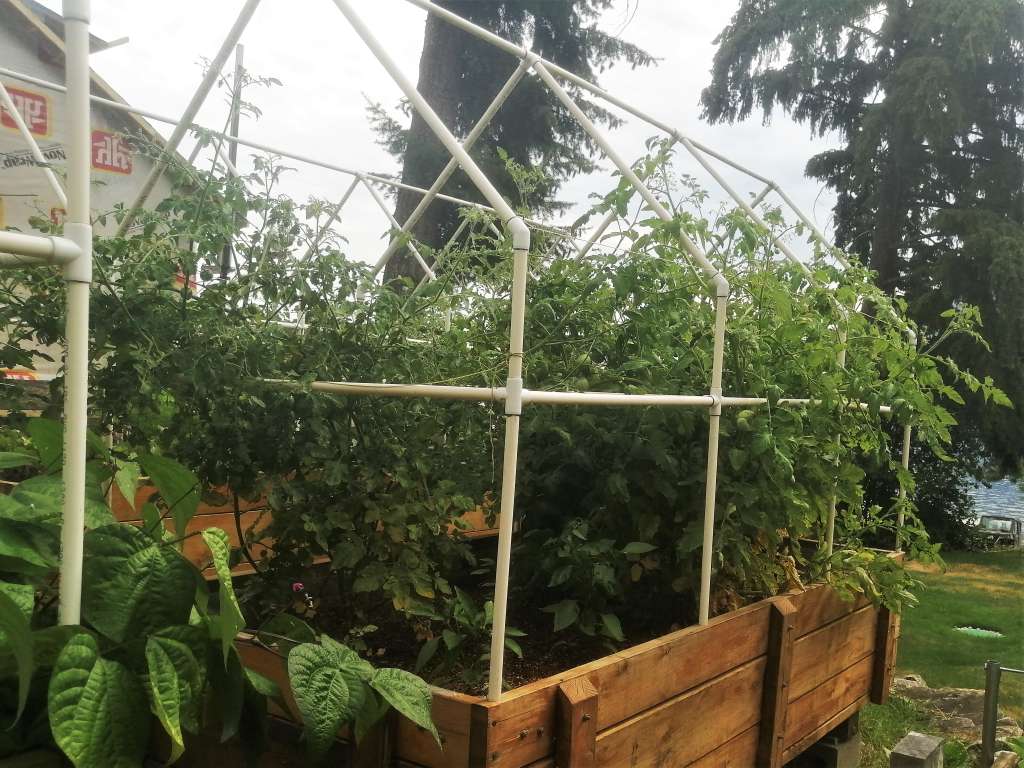
PVC Garden Box supports
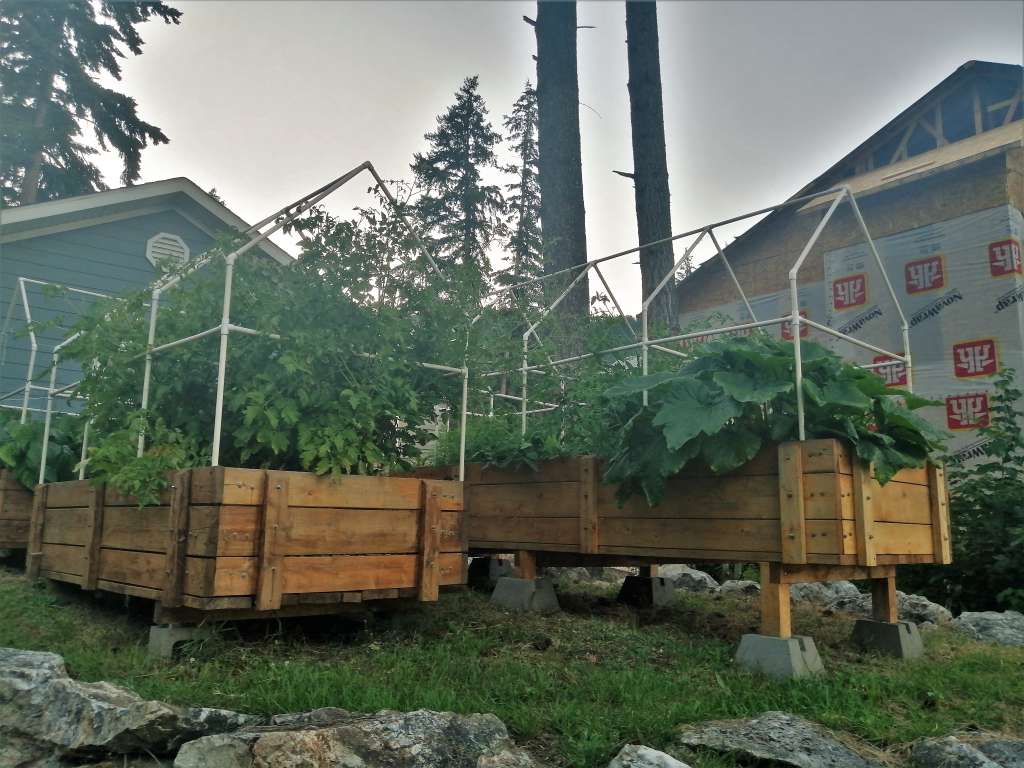
- Designed to support large tomato plants
- Built with 1/2" ID Schedule 40 PVC
PVC Elbows/Tees: 2-way 45°, and 3, 4, 5-way 90°
- Height of cross members designed to maximize plant use, while minimizing bending
- Tested load in center of longest horizontal span = 60 lbs
My father and I build these garden boxes in 2019. They contain plastic liners and perforated pipes under the dirt, creating a "sub irrigation system". Water is stored in the tubes below, like a tank, and can diffuse upwards into the dirt providing watering for days. The water reservoir can be refilled with the black pipe in the corner. The soil is well fertilized, and crops have never been larger. We didn't save the garden box design drawings, but they've stood the test of time! I installed the PVC supports in 2019, as the gigantic tomato crops are too large for the conventional cages.
Also pictured is a square tomato plot design - start with 1 board, and stack more dirt on top as plants grow. Remove boards at bottom to access potatoes!
Yamaha 9.9hp Outboard
- Four stroke 9.9 hp outboard engine for the Catalina 27', high thrust with 20" leg for sailboats, manufactured in 2004.
We had a problem with gasoline getting into the engine oil. There was poor lubrication and extra resistance with the starter cord, I was worried the cylinders would need to be re-honed. I borrowed a borescope camera and observed some scratches/molten metal on the head of the piston. Thankfully, after a fresh oil change, things were sliding OK!
Initially I thought the cause of gas getting into oil was the fuel pump, but the gaskets looked fine upon inspection. My second diagnoses was possible pollution through the carb, while being stored tilted at 90° when out of use. After a season of disconnecting and starving of gas until stall to ensure no gasoline was left inside the engine, there was still a problem with slow oil contamination.
The other option was a leaky fuel pump membrane. This is a rubber diaphragm with oil on one side, and gasoline on the other. Gasoline is sucked into the engine, and moves past the diaphragm causing it to oscillate. The oil reservoir on the other side circulates because of these oscillations.
I inspected the fuel pump membrane the year prior, but it appeared in good condition. I guess it has a microscopic leak, as the Yamaha parts dealer spoke of another customer whom had the same gas-in-oil problem. Since I replaced the fuel pump membrane in 2022, I haven't had a problem!
---
I have one other funny story with this engine. While going out for a brisk sail in January, the engine stalled after idling for 10 mins. I managed to sail back to the marina slip, but after sitting for an hour the engine would restarted normally, but again stalled after 10 mins.
I didn't figure this out until a few days later, but it's important that the ambient air was about +3 Celsius. Air moving into the the air intake has velocity, causing a slight drop in pressure and temperature. Compounding the problem, the carburetor contains a narrow choke points. In the sudden enlargement area after the choke point there is another pressure drop, and ice can form when atmospheric air is near freezing and the engine isn't warmed up. Air and water molecules inside the carb can be below freezing due to velocity and low pressure, while atmospheric air is +3 C. This ice buildup restricts the air supply and causes a stall. After letting the engine sit, the ice melts, and the engine restarts no problem. It turns out this is a common problem for cold outboard engines in the winter! It can be countered by warming up the engine at a high RPM before the ice can form. Bernoulli and Venturi came back to haunt me after fluid mechanics class!
---
I also built a stand that's the perfect height to fully hang the engine on during oil changes (extra long leg length), with a few inches clearance for the oil tray to slide under!
Irregular Quadrilateral Kitchen Counter
When I moved into an older apartment building, there was a space in the kitchen formerly for a small refrigerator. There is not much counter space, so I build a counter to fit into the corner and be flush with the top and front of the stove. I installed under counter lighting, and have no shortage of counter space. The dimensions were a challenge, I measured the side lengths and angles for the open space and used CAD to verify my measurements. I cut out a cardboard prototype to bring to the carpentry shop, just to be sure. It's a perfect fit!
Car Repairs: Valve cover, Coolant leak, Transmission & Brake Pads
I really enjoy DIY car repair. I have completed many projects in the alley behind my apartment, or at my Dad's garage in the Shuswap. I currently have a 2008 Mazda 3, and I'm pleased to report is doesn't break down as much as the 2000 Ford Focus I used to drive!
2000 Ford Focus: It developed an "underpower" problem shortly after purchase. I replaced the fuel filter, spark plugs, and spark wires, but that didn't resolve it. While under load, it would hesitate and the speedometer would ping up to 220km/h for just a moment. No codes. After some time on google, I tried a new Ignition Coil Module and figured it out! ICM's can die gradually/partially, and exhibit weird symptoms. The faulty ICM was creating an unusual magnetic field, which was wirelessly generated current in the speedometer cable running across the engine bay into the dash. Mystery solved!
The Focus was susceptible to failure at its 19 year age. The valve cover was made out of a plastic composite, and it started melting and leaking oil out of the front edge! I took it apart and picked up a new gasket, and in lieu of sourcing a new valve cover for $200+, I bought some high temp liquid copper gasket and just globbed it in there to fill the gaps. I installed a little aluminum heat shield to protect the area... But after ~4 months, I started smelling oil again! It had melted in a new place on the valve cover not protected by my heat shield. I still had some liquid gasket left, so I cleaned everything off and redid the procedure, and installed a lengthy heat shield to fully protect the front side of the valve cover from the Exhaust Manifold heat. The liquid gasket held up nicely over time, there have been no more oil leaks. Please take notes automotive engineers, cars aren't supposed to melt!
During my three year ownership the Focus also went through two starter solenoids that I was able to replace (the first solenoid was a refurbished part that only lasted a month!). It also ruptured a plastic radiator hose, and the water pump seized while I was stuck in traffic. I opted to have a shop take replace the water pump, as I was having a hard time getting leverage/clearance for the serpentine belt tensioner while only raised on a short spare tire jack.
I've been driving the 2008 Mazda 3 since 2019, my dad and I worked together to service the transmission and change the rear brake pads shortly after I bought it. Over time it popped codes for both the high and low oxygen sensors, which didn't affect performance noticeably, but I did replace. Otherwise it's been reliable! Unfortunately I scraped into a parkade pillar on one belligerent early morning and took out my side turn signal, but I was able to find the panel in a scrapyard for $90 in the exact same body colour.
Fingers crossed for no more car projects!
Shelf for my lizard (and television)
I built this shelf from 1x4", for my bedroom in the last house I was living in. I had a very small room, and an empty space beside my piano about 16" deep. I wanted to maximize usage of this space, and put a TV on top at a nice viewing height. I couldn't find any pre-made shelves close to these dimensions, so I made one! $30 SPF materials, and design by me. I cut one 1x4"in half on the table saw to be the middle strip, to hit my target depth of 16". (The SPF is 15.75" deep, plus 1/4" particle board backing). 15.75" = (3.5"*4) + (3.5"/2)
With careful pilot holes, I was able to hide all screwheads on the outside and top of the shelf. My lizard used to live on the second shelf, I specified the shelf height to accommodate his smaller tank. Pictured is a mesh lid I build for the smaller tank, cat protection. He's since moved up to the top shelf penthouse!


